
|
JCapper Message Board JCapper 101
|
| Home |
Register
Log In |
| By | xth start on lasix | |
| SILVER01HDW 1/10/2016 5:21:19 PM | If I wanted to create a UDM for xth start on lasix, where would I find that factor in the UDM Wizard?
| |
| jeff 1/10/2016 8:32:00 PM | Adding Xth Start Lasix to a playlist file UDM is accomplished by adding the correct preset filter codes to your UDM Definition. If you do not see a factor you want to use in the factors drop down of the UDM Wizard: Most of the time you can work a handle for that factor into your UDM Definition by using filter codes. Link to the Preset Filters page at JCapper.com: http://www.jcapper.com/presetfilters.asp Hint: Scroll down (or search the page at the above link) to get to the Xth Race on Lasix Preset Filter Codes. The Xth Start Lasix filter codes can be found starting at #278 and begin with the characters "XLS" (without the quotes.) FYI: The XLS or Xth Start Lasix filter codes are meant to dovetail with the MED filter codes that can be found starting at #36 - also at the above link. In my opinion - the best strategy in playlist file mode to make a UDM return horses having a specific Medication Code profile is to use the two sets of filter codes - MED and XLS - to filter out horses that don't fit the profile you want. In other words: Filter out the ones you don't want - and the remainder will be the ones you do want. Example: Suppose you want to create a playlist file UDM that returns 2nd time lasix horses - or horses making start number 2 on lasix today. You could accomplish that by adding the following filter codes to a UDM Definition: FilterCode Description Basic Operating Instructions: 1. In the UDM Wizard, create the basic template for the UDM, and then on the Modify UDM Screen, select Filters as your factor. 2. Click the Preset Filter Tool button. This will launch the Preset Filter Tool. 3. In the Preset Filter Tool, select XLS0 as your first filter code. This will add the filter code to the small preview window. Hint: The Filter Codes drop down in the Preset Filter Tool responds to keystrokes. Open up the drop down and begin keying your filter code and the drop down will auto scroll as you key the characters. 4. After selecting a filter code click the ADD FILTER button. This will move the filter code to the big preview window. 5. In the Preset Filter Tool, select XLS1 as your next filter code. This will add the filter code to the small preview window. 6. After selecting a filter code click the ADD FILTER button. This will move the filter code to the big preview window. 7. In the Preset Filter Tool, select XLS3+ as your next filter code. This will add the filter code to the small preview window.. 8. After selecting a filter code click the ADD FILTER button. This will add the filter code to the big preview window. 9. Finally, click the SAVE AND CLOSE button. This will close the Preset Filter Tool and write the filter codes in the big preview window to your UDM Definition. That's it! (For playlist file mode.) I'll cover sql mode in a separate post. Note: The above procedure is the same no matter what Preset Filter Codes you are working with. Alternately, instead of using the Preset Filter Tool, you can key filter codes directly into the Special Filter Codes box on the Modify Screen of the UDM Wizard. Hint: If you do it this way be careful that you key in the exact codes. (And you also want to separate multiple filter codes with dash characters.) Here's a screenshot of the Preset Filter Tool after step 8 above: 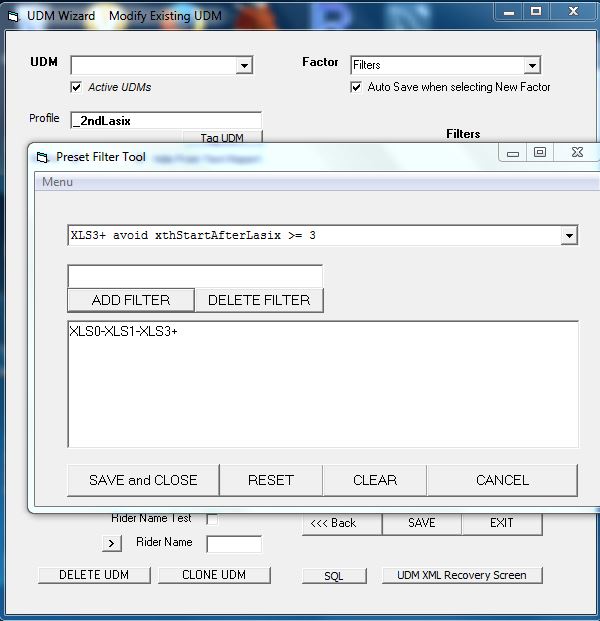 And here's a screenshot of the UDM Wizard after step 9 above: 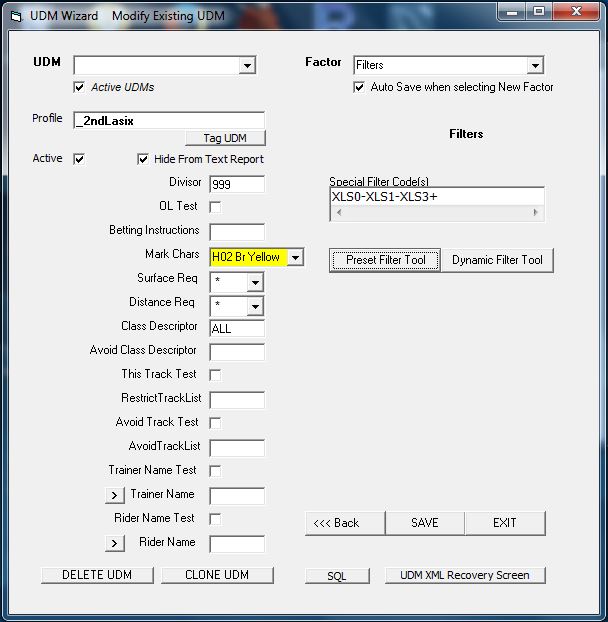 One final note: It's always a good idea to check your work by running a UDM through the Data Window. In this case I'd run the above UDM through the Data Window with the data broken out by Xth Start After Lasix... and expect to see the UDM return a results set that looks something like those in this screenshot: 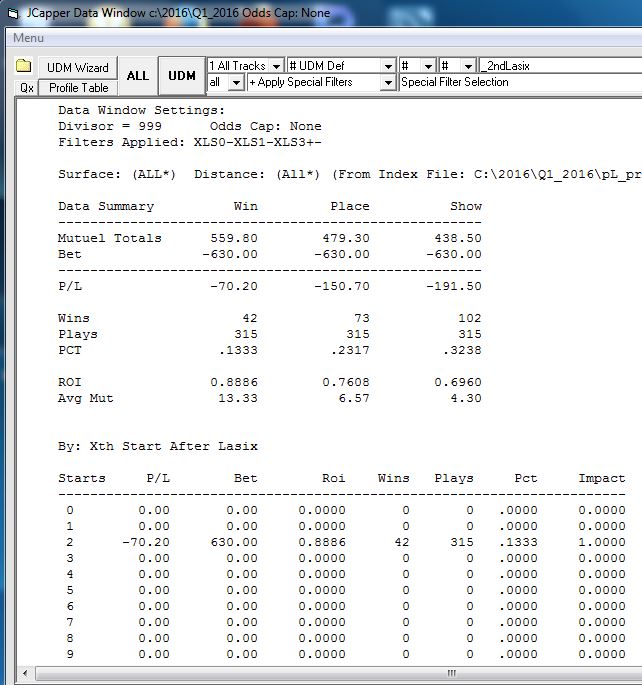 -jp .
| |
| jeff 1/11/2016 1:32:42 PM | SQL Mode - Xth Start Lasix Xth Start Lasix in sql mode is much easier than Xth Start Lasix in playlist file mode. In sql mode you simply reference the XthStartLasix field in the StarterHistory table. Sticking with the same example from the above post - where the goal is to make a UDM return horses making their second start on lasix - adding the following line of sql to the UDM Definition will get the job done: AND XTHSTARTLASIX = 2 Or alternately, if the only thing we want the UDM to do is return horses making their second start on lasix - the following line of sql can be used as the entire UDM Definition: SELECT * FROM STARTERHISTORY WHERE XTHSTARTLASIX = 2 Just like in playlist file mode - in sql mode it's always a good idea to double check your work by running a UDM or sql expression through the Data Window. Here's a screenshot of what the above sql expression looks like in the Data Window with the data broken out by Xth Start After Lasix: 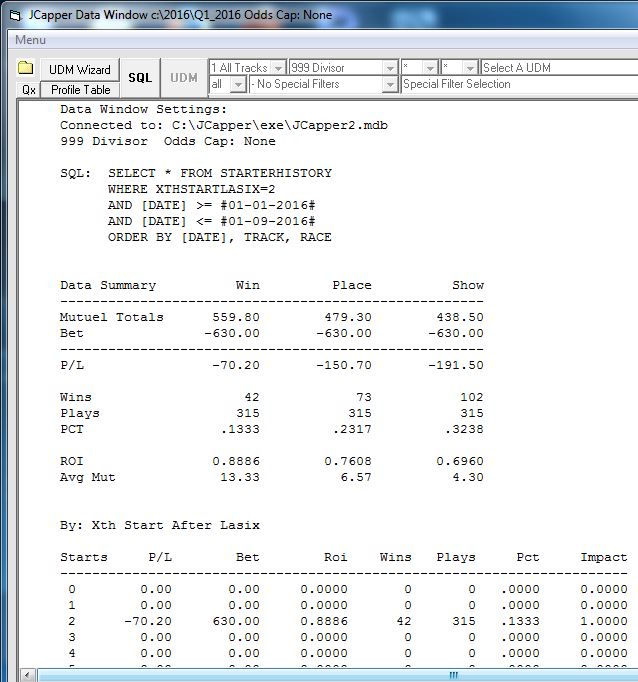 -jp .
|
| Reply |
|
Copyright © 2018 JCapper Software back to the JCapper Message Board www.JCapper.com |