
|
JCapper Message Board JCapper 101
|
| Home |
Register
Log In |
| By | JCapper Rebuild | |
| rosenowsr 7/18/2013 2:57:42 PM | I deleted my JCapper program. Don't bother to ask how(it is a long and stupid sounding story,LOL).Luckily I saved my files, which consist of 1 1/2 years of racing. They are files HDW2012 and file HDW2013, which are divided further into quarterly sub folders. I do all my UDM's in SQL. Here is what I think is the proper sequence for a rebuild. Rebuild folder HDW2012 in Mode 3. Do I have to do the sub folders separately? Or just rebuild folder HDW2012 and it will automatically do the sub folders? Then rebuild folder HDW2013 in Mode 4 and anything in the future in Mode 5. Thanks in advance. Steve
| |
| jeff 7/20/2013 3:42:53 PM | Rebuilding Databases From Scratch - Folder Structure - Build Mode - Instructions Based on what you wrote, the folder structure on your C:\ drive can best be described as follows: -C:\ (the root folder on your c:\ drive.) --And beneath that: a yearly folder for each calendar year. ----And beneath each of the folders for each calendar year: 4 folders - one for each calendar quarter. Expanded (for calendar year 2012) your folder structure is as follows: C:\ --2012 ----Q1_2012 ----Q2_2012 ----Q3_2012 ----Q4_2012 Expanded (for calendar year 2013) your folder structure is as follows: C:\ --2013 ----Q1_2013 ----Q2_2013 ----Q3_2013 ----Q4_2013 That's (essentially) the same folder structure that I am using. Screenshot here: 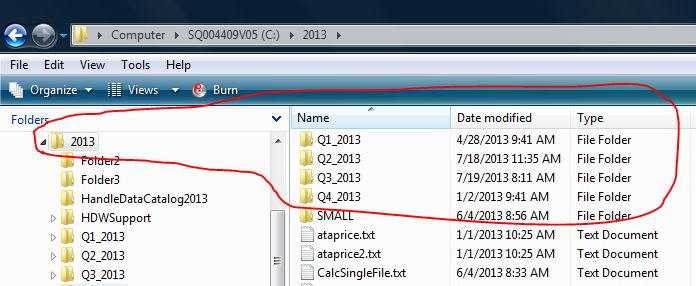 I'm going to make an educated guess that when you downloaded files from HDW during Q1 2012 you downloaded them to the c:\2012\Q1_2012 folder. I'm also going to make an educated guess that when the calendar rolled over to the next calendar quarter, you went into the DFM and used the interface to switch back and forth between the then current calendar quarter and the new calendar quarter - so that you began downloading and processing files for the new Q2 calendar quarter on the Q2 folder (and downloaded and processed any remaining Q1 files from the previous calendar quarter on the Q1 folder.) That would be the correct procedure to follow each time the calendar rolls over into the next new quarter. The result of adhering to that is this: • Files for races run in Q1 are stored on the Q1 folder. Therefore, when building database(s), you would run a build on this folder - because it's a folder where YOU ARE STORING YOUR FILES. • Files for races run in Q2 are stored on the Q2 folder. Therefore, when building database(s), you would run a build on this folder - because it's a folder where YOU ARE STORING YOUR FILES. • Files for races run in Q3 are stored on the Q3 folder. Therefore, when building database(s), you would run a build on this folder - because it's a folder where YOU ARE STORING YOUR FILES. • Files for races run in Q4 are stored on the Q4 folder. Therefore, when building database(s), you would run a build on this folder - because it's a folder where YOU ARE STORING YOUR FILES. Note: You would not run a build on the top level yearly folder because you are not storing data and results files there. Building Databases/BASIC OPERATING INSTRUCTIONS: With those definitions out of the way, here's how to rebuild everything from scratch: 1. Bring up the DFM and persist the very first folder that you want to build as the current active data folder. No, not the top level yearly folder. Persist the folder where you downloaded your files to... the same folder where you ran .JCP and .XRD file builds... the same folder YOU are using to STORE your .JCP and .XRD files. Check this folder as the current active data folder and x-out of the DFM. Hint: If you are the least bit unsure of what that means, you might try the Windows Explorer 101 Video at the following link: JCapper BASIC Videos 2. Bring up the Database Builder. Select MODE 3 as your build mode and double check the file type in the file type drop down (it should read: HDW JCapper Data file (*.jcp)) and run the build. At the end of this build you will have a new pl_profile.txt file on the folder you just built. You will have a StaterHistory table populated ONLY with data for starters read from the .JCP and .XRD files on the folder just built. 3. Bring up the DFM and use the interface to persist the next folder that you want to build as the (checked) current active data folder. Again, you want to check/persist the actual folder where you are storing your .JCP and .XRD files. Hint: If you are the least bit unsure of what any of that means, you might try the videos at the following link: JCapper BASIC Videos After using the DFM interface to persist that next folder, x-out of the DFM. 4. Bring up the Database Builder. Select MODE 4 as your build mode and double check the file type in the file type drop down (it should read: HDW JCapper Data file (*.jcp)) and run the build. Note: To be on the safe side, whenever you are running (Mode 4) builds on one folder after another, before running each build, take the time to manually select/reselect your build mode (in this case Mode 4) for the build you are about to run. Don't assume that because you selected it for the previous build means that you don't have to select it for this build. (Take a second and reselect Mode 4 as your build mode.) At the end of this build you will have a new pl_profile.txt file on the folder you just built. This build will take data for the starters in the .JCP and .XRD files on the folder just build and APPEND that data to your StarterHistory table. (Meaning that your StarterHistory table now contains data for all folders built during this sequence.) 5. Repeat steps 3 and 4 as needed until you are out of folders. THAT'S IT! (You have now brought everything current.) At the end of this sequence: You will have a new pl_profile.txt file on each of the folders you just built. (So that you can use the Data Window in playlist file mode to query each of the individual folders.) At the end of this sequence: Your StarterHistory table now contains data spanning ALL folders built during this sequence. (Meaning that you can use the Data Window in SQL Mode to execute queries spanning all time periods covered by your folder structure.) Now that everything has been brought current, as you add new data and results files to the folder you are using for the current time period (after running the first build on that folder in Mode 4) all subsequent builds for that folder can be run in Mode 5. NOTE: When running database builds one folder after another - to be on the safe side - ALWAYS re-select the build mode (MODE 4) before starting the next build (even if it is still selected as mode 4 from the previous build.) NOTE: When running database builds one folder after another - to be on the safe side - ALWAYS check the file size of the c:\JCapper\Exe\JCapper2.mdb file prior to running a build on that next folder. Avoid (at all costs) running a build likely to make the file reach 2.0 gigabytes in size. See my comments below about max file size of 2.0 gigabytes for .mdb files. Important Related Items: Rule: Never mix files from different years on the same folder. Break this rule on a given folder and you run the risk of rendering the Database Builder incapable of building a database on that folder. (The fix involves you examining the files on that folder and removing the ones you put there from the wrong year.) Rule: Keep your c:\JCapper\Exe\JCapper2.mdb file under 2.0 gigabytes in size. JCapper2.mdb File (File Size Limit) Q. Where is my StarterHistory table located and how much data can I store in it? A. Your StarterHistory table is located in the following file: c:\JCapper\Exe\JCapper2.mdb. You need to be VERY aware that the max file size for an .mdb file is 2.0 gigabytes (or 2000mb.) DO NOT, under any circumstances exceed that file size. (If you do, the file will be rendered unusable.) Realistically, you can expect to store about 2 years of StarterHistory data in a JCapper2.mdb file before you bump up against that file size limit. Every time you do a program install, the installer will leave a fresh blank current version copy of the JCapper2.mdb file in your c:\JCapperBuild folder. Once your current JCapper2.mdb file contains enough data (18 months or thereabouts would be a good amt of data for your to begin worrying about file size) - start checking the file size of the JCapper2.mdb file. At some point prior to reaching 2.0 gigabytes - you will need to rename your current c:\JCapper\Exe\JCapper2.mdb file in order to preserve it - and after doing that - you will need to copy the fresh blank current version JCapper2.mdb file from the c:\JCapperBuild folder to your c:\JCapper\Exe folder and begin using it. At this point, if you have a custom sql factor setup or a custom sql html report layout, or if you are using the TripNotes or WagerHistory Modules - you would want to use the JCapper2 Imports Module to import data out of your old/renamed JCapper2.mdb file into your new file before you start using it. Note: Obviously you would not want to import StarterHistory data out of your old file and into your new file at this time because that would cause you to bump up against the 2.0 gigabyte file size limit. -jp . ~Edited by: jeff on: 7/19/2013 at: 2:54:33 PM~ ~Edited by: jeff on: 7/19/2013 at: 8:57:41 PM~ ~Edited by: jeff on: 7/20/2013 at: 3:42:53 PM~
| |
| rosenowsr 7/19/2013 2:56:20 PM | In the process of re-building now. Thanks for the info, I didn't know there was a size limit to the MDB file. Thanks again
|
| Reply |
|
Copyright © 2018 JCapper Software back to the JCapper Message Board www.JCapper.com |